Photoshop is a capable graphics editor with a plethora of functions. However, certain features demand a lot of system RAM to work. As a result, you may find a pop-up message informing you that Photoshop could not complete your request because the scratch disks were full. Scratch disks are areas of your computer’s hard drive where Photoshop saves temporary files while editing your image. When your scratch disks are full, Photoshop runs out of space for these files, and everything comes to a standstill. The good news is that there are several effective ways to address this problem. Follow the steps below to learn how to fix the Photoshop scratch disk full error.
How To Quickly Free Up Additional Disk Space On Windows 11?
Photoshop requires at least 20 GB of free space on your hard drive to function properly. If you don’t have that much space, there are ways to free up hard disk space on Windows first. To make more disk space available in Windows 11.
1 – Select Settings from the Start menu.
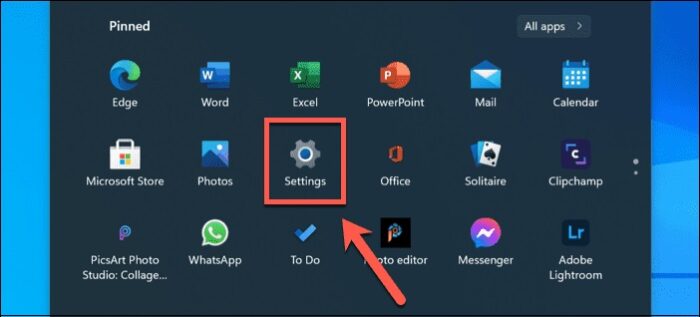
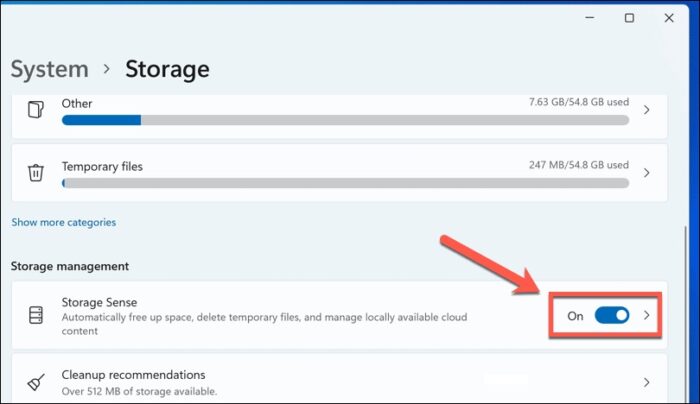
2 – In Settings, go to System > Storage.
3 – A breakdown of how your storage is being used will be shown. Pick one of the options (for example, Temporary Files) to examine more information and take further steps to delete the files.
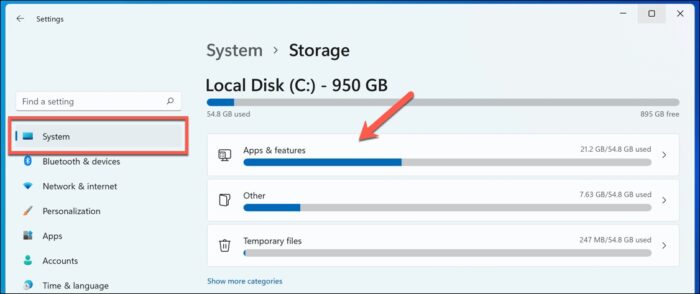
4 – You can also enable Storage Sense, which will automatically free up space if you press the slider next to Storage Sense.
Work through the options until you’ve at least 20 GB of free space. Well, the more space you free up, the less likely it is that the Photoshop scratch disk full error will appear.
How To Quickly Free Up Additional Disk Space On Mac?
Whether you’re using Photoshop on macOS, you may test if freeing up any more disk space fixes the Photoshop scratch disk full error. The good news is that macOS has several easy tools to help you automatically free up storage on your Mac. Here’s what you should do:
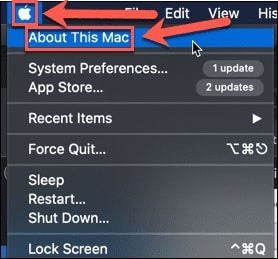
1 – From the menu bar, select Apple > About This Mac.
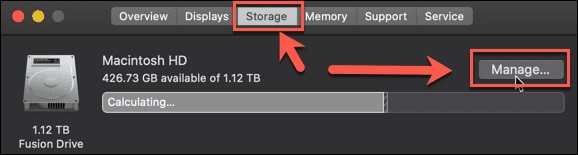
2 – Navigate to Storage > Manage.
3 – To select freeing up memory space, choose one of the offered options.
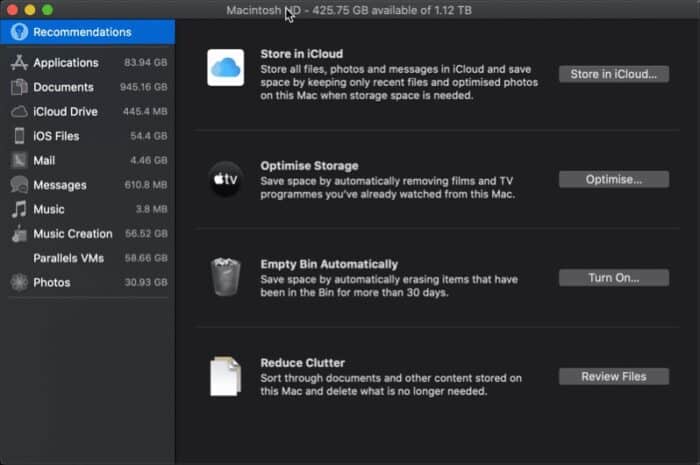
You may work on one or all of the suggestions. The current amount of free storage is shown at the top of the window. Well, the more storage space you can free up, the less likely the Photoshop scratch disk full Mac error will reoccur.
How To Quickly Select Different Scratch Disk Drive In Photoshop?
If you have cleaned up all the space you can and are still seeing the scratch disk full Photoshop warning, you may have extra space on other hard drives on your PC. If this is the case, you may redirect the scratch disk to one of your other drives. There are two ways. If Photoshop is not open, complete the following steps:
1 – Open Photoshop.
2 – Hold down Ctrl + Alt on Windows or Cmd + Option on Mac while the app is loaded.
3 – Select an alternate hard drive in the Scratch Disk Preferences box that displays.
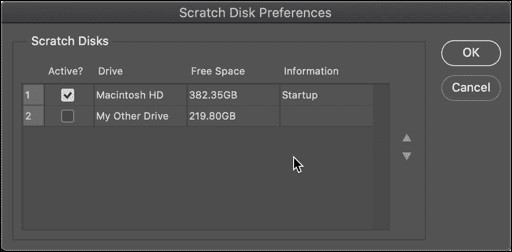
4 – If you like, you may select more than one hard drive and use the up and down arrows to decide which is used first.
5 – Click OK to confirm your selections.
If Photoshop is already open, you may do the following actions:
1 – On a Mac, go to Photoshop > Preferences > Scratch Disks; on Windows, go to Edit > Preferences > Scratch Disks.
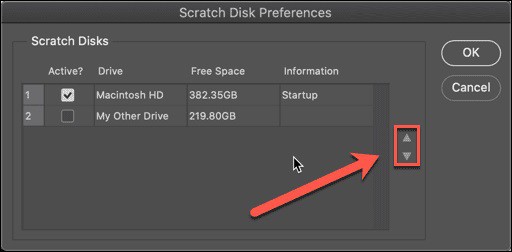
2 – Choose the new hard drive for your scratch disk in the Preferences box.

3 – You may select numerous hard drives and adjust the order using the arrows to tell Photoshop which one to use first.

4 – Click OK.
Photoshop will now use the hard drive(s) you choose as the scratch disk.
How To Quickly Clear Photoshop Cache?
Another source of Photoshop scratch disk full messages is having unnecessary temporary files taking up a lot of space. These might include huge images copied to the clipboard. To remove cache files in Photoshop, follow these steps:
1 – Launch Photoshop.
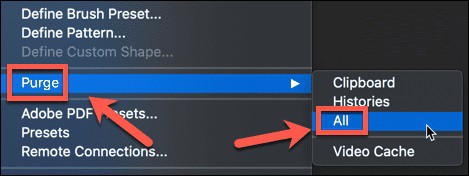
2 – Select Edit > Purge > All from the menu. If you prefer, you may delete the clipboard or history.
3 – A pop-up window will appear, asking you to confirm your selection. Click OK.
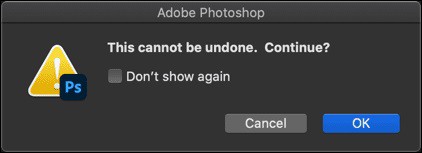
Your cache should be cleared now.
How To Quickly Let Photoshop Use More RAM?
Photoshop will need to write to the scratch disk less often if more RAM is available. Photoshop will use 70% of available RAM by default, but you may increase this if necessary. Well, to increase the amount of RAM available to Photoshop:
1 – On a Mac, go to Photoshop > Preferences > Performance; on Windows, go to Edit > Preferences > Performance.
2 – Slide the slider to increase Photoshop’s RAM available. It is advisable to keep it inside the Ideal Range, shown above the slider.
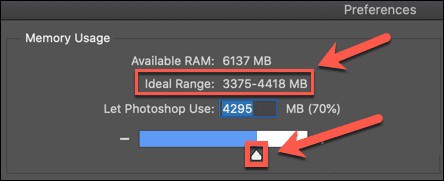
3 – Once you’ve chosen your choice, click OK.
If your computer becomes slow after making these adjustments, return the RAM to its previous levels.
Conclusion:
Knowing how to easily fix the Photoshop scratch disk full error can prevent it from slowing down your PC or Mac while you are editing photographs. However, it isn’t a complete fix, and if the error repeats, consider upgrading your PC or Mac with more RAM or storage.