
It is a Guide about Clear instructions about how you can Make One Page Landscape Microsoft Word 2019 or 2016 document. So, Just follow these steps to know about How to Make One Page Landscape in Word 2019/2016.
1. First, Place your cursor at the very beginning of the page that you would like to flip to the Landscape. Here, (We work with page 2 in our example)
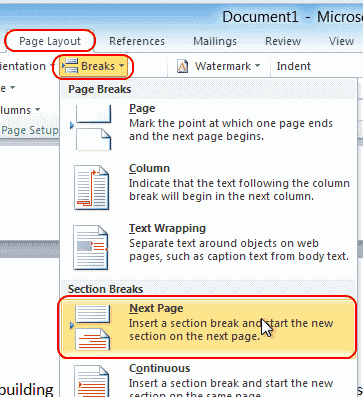
2. Then, Select “Layout” or “Page Layout” > “Breaks” > “Next Page” to create a section.
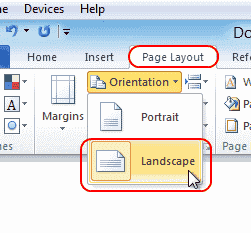
3. Next, select the “Page Layout” tab & select “Orientation” > “Landscape. “
Now What this actually does is mark all pages after the break you made in step 2 as Landscape. In our Instance, pages 2, 3, 4, and forward are in Landscape. Also, Since we want page 2 to display in the Landscape, we will need to change any forward pages back to portrait.
4. Here, Place your cursor on at the beginning of the next page (page 3 in our example) or the next page you wish to remain in portrait.
5. Now, Select “Page Layout” > “Breaks” > “Next Page,” just like in step 2, to create another section.

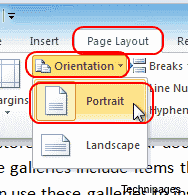
6. Finally, Select the “Page Layout” tab and select “Orientation” > “Portrait. “ It will make the rest of the document display in portrait.
That’s all there is to it! You have successfully made a single-page landscape in Microsoft Word 2016 and 2013.
Additional Tip: If you have a header on your first page and don’t want it to be on the landscape page, you can do this (after making the page landscape):
Also, Check :
1. Click Right on the header on the landscape page and select “Edit Header.”
2. Then, click the “Link to Previous” button so that it is no longer highlighted.
3. Next, Delete the heading for that page. It should remain on page 1.