
Page orientation is a crucial feature of Excel formatting that influences how your worksheet appears when printed or viewed. Excel defaults the page orientation to portrait mode, but you may need to switch to landscape mode to view your worksheet better. In this tutorial, you’ll learn how to change the page orientation of a single worksheet and/or an entire workbook in Excel.
How To Change Page Orientation Of A Spreadsheet In Excel?
There are many ways to change the page orientation of an Excel spreadsheet.
Using Page Layout
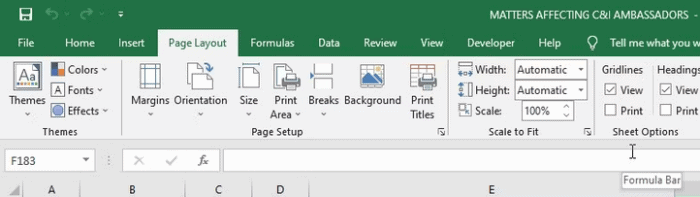
You may change the page orientation in Excel using the Page Layout option.
1 – Begin by opening the worksheet in the orientation you wish to change.
2 – At the top of the window, choose the Page Layout tab.
3 – Choose the Orientation option.
4 – Select between Portrait or Landscape orientation.

Using Page Setup
You may change the page orientation of your spreadsheet using the Page Setup tool if you need to change one and/or two settings in the Page Setup window. This is how.
1 – Open the Excel worksheet.
2 – Choose the Page Layout tab.
3 – Click the arrow in the group’s bottom right corner to navigate to Page Setup.
4 – At the top of the dialog box that appears, click the Page tab.
5 – Choose Portrait or Landscape under the Orientation section.
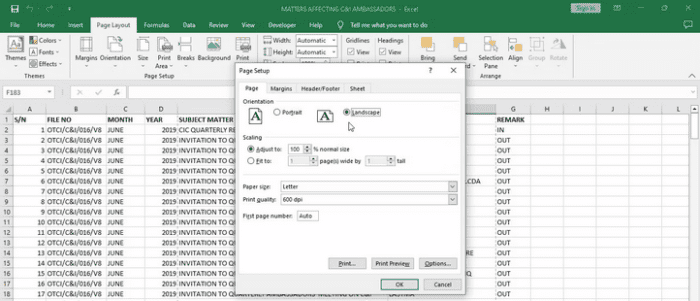
6 – To save your changes, click OK.
You may also alter the page scale in the dialog box to suit your Excel spreadsheet to your screen.
Using Print Preview
When printing, you may also change the page orientation of an Excel spreadsheet. This approach is useful because it lets you see how your worksheet will appear before printing it. Here’s how to change the orientation of a page using the print preview window.
1 – Open the Excel spreadsheet.
2 – Select Print by clicking the File tab.
3 – Click the Page Orientation drop-down menu in the Settings section.
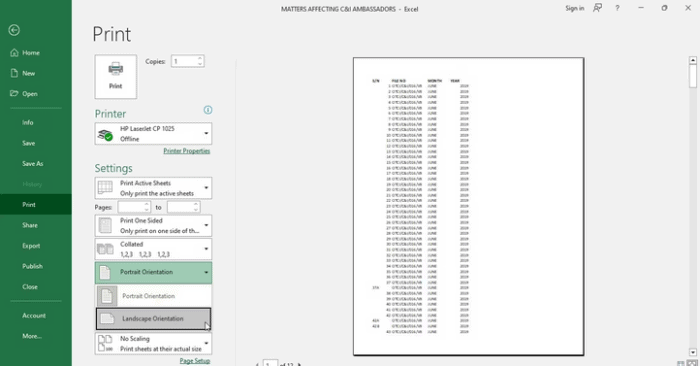
4 – When ready to print, select the page orientation you wish to use and press Print.
Using Keyboard Shortcut
Use the methods below if you prefer using keyboard shortcuts.
1 – On your keyboard, press Alt + P + O in that order.
2 – Choose Portrait or Landscape from the drop-down option at the top of the screen.
How To Change Page Orientation Of Multiple Spreadsheets In Excel Using VBA?
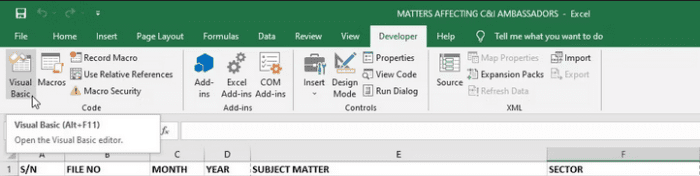
Well, when you change the page orientation of a spreadsheet, it only affects that sheet and no other sheets in your workbook. Changing the orientation of each sheet might take time, particularly if the workbook has many worksheets. Here’s a quick VBA approach you may use to change the page orientation of numerous worksheets in your Excel workbook.
1 – Launch the workbook you want to edit.
2 – To open the Visual Basic Editor, click the Developer tab and choose Visual Basic.
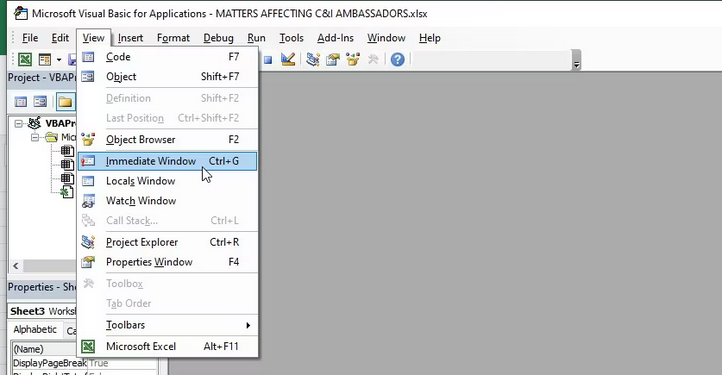
3 – Choose Immediate Window by clicking the View tab. You may also use the Ctrl + G keyboard shortcut.
4 – In the Immediate window, enter the following code.
For each ws in Worksheets: ws.PageSetup.Orientation = xlLandscape: Next ws5 – Press Enter to close the VB editor.

The landscape orientation should now be applied to all worksheets in the workbook. Type the subsequent code in the Immediate window and click Enter to switch to portrait mode for the page orientation.
For each ws in Worksheets: ws.PageSetup.Orientation = xlPortrait: Next wsConclusion:
Excel is excellent for data management and analysis, but the default page orientation may need to be revised for the data you’re working with. Changing the page orientation in Excel may assist in enhancing the layout and legibility of your data, whether for printing or presentation. For example, you may switch between portrait and landscape orientations and arrange your spreadsheets the way you want them with a few clicks.