
Newsletters might take much time to create, but they don’t have to. You can produce personalized newsletters that capture your audience’s attention with the correct tools and a little know-how. Microsoft Word enables you to create your newsletter templates and provides a variety of free templates that you may customize. Continue reading to find out how to create newsletter template in Word from start to end.
Why Should You Create A Newsletter Template?
Thanks to templates, you don’t have to start from scratch every time you want to produce a newsletter in Word. The template includes pre-set components based on a basic design and structure, removing the need for human effort. This saves time and allows you to concentrate on creating the content for your newsletter. Although you can always use Microsoft Word’s free built-in newsletter templates, creating your unique template may better represent your company’s style and branding and help it stand out from rivals. Creating your template allows you to maintain branding consistency and add distinctive elements such as custom colors, images, and fonts.
How To Create Newsletter Template In Microsoft Word?
To create your first newsletter template in Word, follow these steps.
Open Blank Document
Begin by creating a new document. Click Blank Document in Microsoft Word.
Set Page Layout
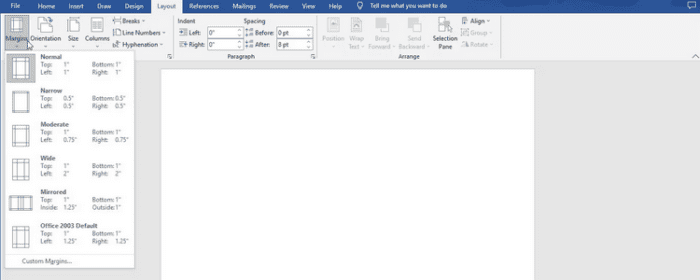
Setting the page layout is critical before you start creating your newsletter. To begin, go to the Page Layout menu and select Margins. Then, choose between pre-set margins and custom margins. You may change the page orientation or use landscape and portrait orientations in the document.
Create Header And Footer

The next step is to create the header and footer for your newsletter template. Important information, like the name of your newsletter and the date, will be included in the header and footer. Navigate to the Insert tab and select Header or Footer to add a header or footer to your document. You may add text or images to the header or footer by entering or copying the images.
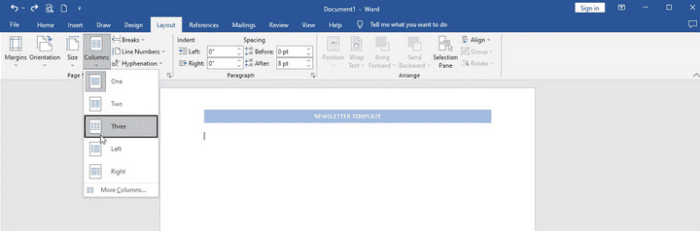
Add Columns To Template
Columns may store text as well as guide the flow. This is how.
1 – Select Columns from the drop-down menu under the Layout menu tab.
2 – Select one of the pre-set column options: One, Two, Three, Left, or Right.
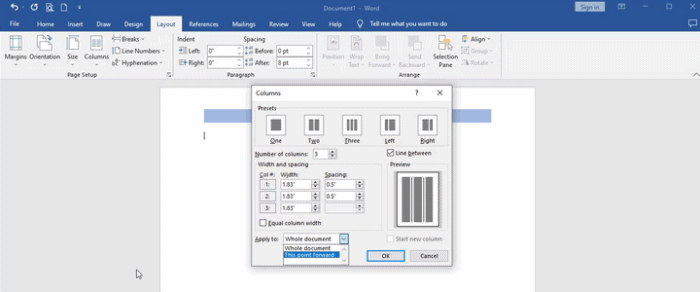
3 – Choose More Columns to insert four or more columns or customize the width.
4 – Uncheck the Equal column width option and set your desired width.
5 – To add a separating line between the columns, check the Line between boxes.
6 – Select This point from the drop-down option and click Apply to. The columns will be inserted underneath the headline as a result of this.
Enable Rulers
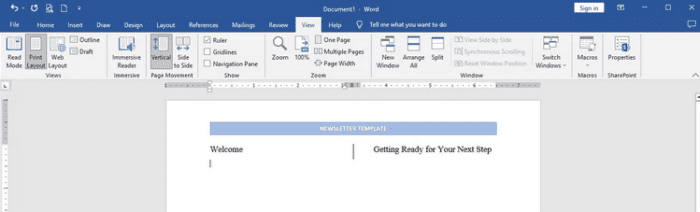
The Word Ruler is a tool for visually adjusting the width of columns and margins. Relying on your Microsoft Word settings, you may already see rulers at the top and left of your document. If no rulers appear, click the View tab and check the Ruler box. The top ruler specifies where your columns will go.
Add Headings
Using a heading assists individuals in scanning the document and comprehending its content, even if they need more time to read it fully. To create a heading format.
1 – Highlight the heading and right-click it.
2 – From the Styles option, choose Heading 1.
Add Table Of Content
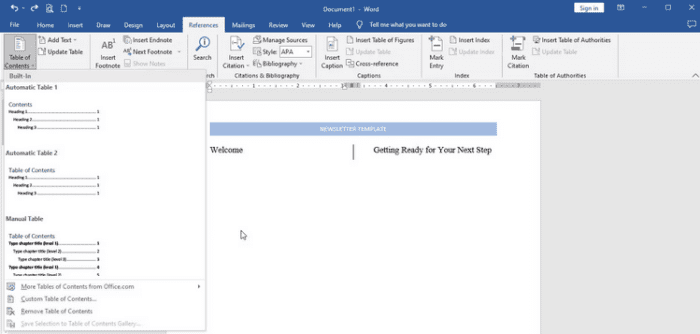
A table of contents is an essential component of every newsletter. It enables your readers to move through the various parts of your newsletter effortlessly. Go to the References tab and choose Table of Contents to add a table of contents manually. You may also use one of the online free Microsoft Word tables of content templates.
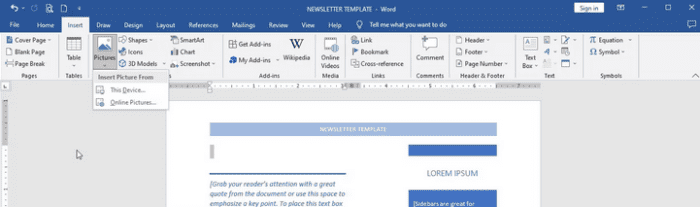
Add & Format Images
You may now add images to your newsletter template that has been set up. This is how.
1 – To insert a placeholder image, click Insert and choose Pictures.
2 – Choose an image and press Insert.
To format the image.
1 – Click and drag the image corners to fit the image into the column of your template.
2 – Click the Layout Options button in the top-right corner of the placement image.
3 – Select “See More.”
4 – Select the Text Wrapping tab and change the Distance from the text.
5 – Adjust the gap height between the text and the image using the up and down arrows.
Insert & Format Text Boxes
Text boxes, instead of columns, enable you to position text more accurately. Insert a text box into your template.
1 – Select Insert, then Text box.
2 – To position text boxes, drag their corners as you did with images.
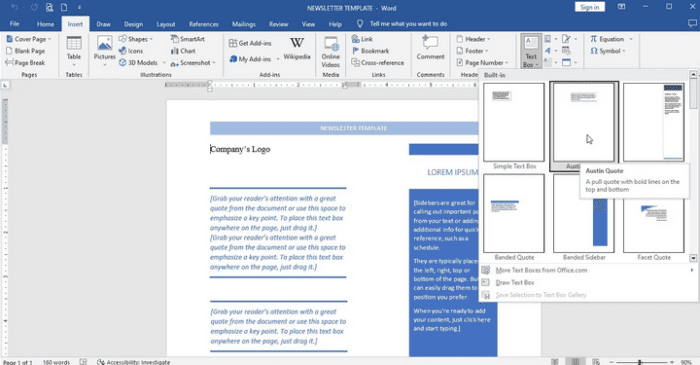
You may choose from the numerous text box choices or create a simple text box that you can format to your liking.
Edit Template
Add additional text boxes, headlines, and images to incorporate more information in your newsletter template. You may keep doing this until you’re happy with the template. Personalize components of your email by highlighting the text you wish to change, right-clicking it, and then selecting one of the pre-set styles or adjusting the color, size, and font to your liking.
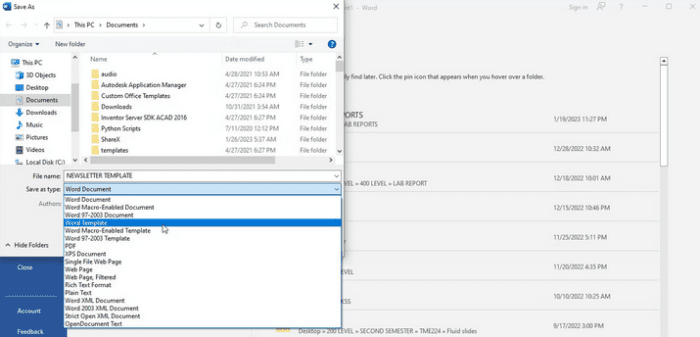
Save Newsletter
When you’re done creating your newsletter template, please save it to your desktop. It may be saved as a standard Word document or as a template. It may be saved as a template.
1 – Select Save As from the File menu.
2 – From the Save As Type option, choose Word Template.
3 – Click the Save button.
To use your freshly created newsletter template, launch Microsoft Word and click New. The template may be found under the Personal menu. To use the template for your newsletter, click it.
The Bottom Line:
Well, creating a newsletter template in Word is a straightforward procedure that can be completed in a few easy steps. You can create a template personalized to your requirements by following the step-by-step method explained above. If you’ve considered starting a newsletter, a custom template in Microsoft Word might be an inexpensive method to test the waters and see how your audience reacts to the information you give.