When you try to manage remotes, it feels like you’re trying to pay your bills. Fortunately, if you use a Fire Stick to stream your favorite TV shows and movies, you can do your part to cut down on the number of remotes and gaming controllers in your living room. Of course, if you’ve a Fire TV Stick, you may already have a remote to control your volume. If you don’t, that’s fine. In this guide, you’ll see how you can change the volume on your Fire Stick. Let’s start now!
Use Firestick Remote To Control TV Volume
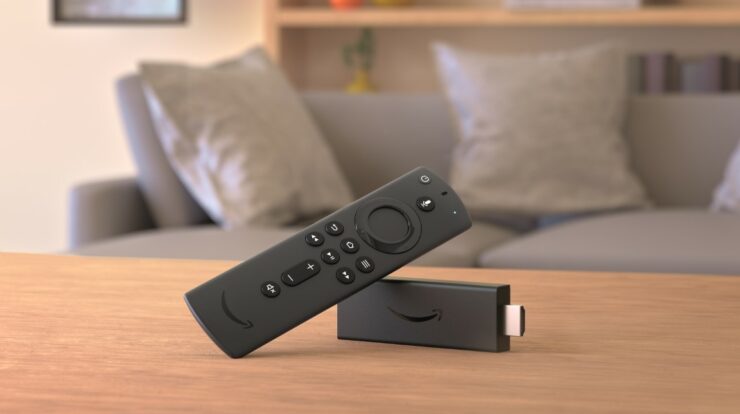
When Amazon started making the Fire remote for the Fire Stick 4K, they started to put a volume rocker on it and a mute button, and a power button on it for your TV. It doesn’t matter what TV you have. It might not be able to handle the input. Your TV must be able to use High-Definition Multimedia Interface-Consumer Electronics Control (HDMI-CEC), and your Fire Stick must be plugged into a port that can use CEC.
It’s good news for anyone who doesn’t already have an Amazon Fire TV remote with a volume button because you can buy the most recent version from Amazon without buying a new device. Amazon sells remotes by the piece. Well, The more recent releases work with all Fire Sticks and most Fire devices, except for early Fire TV boxes or TVs with Fire OS built-in, which don’t work with the more recent remotes.
Pairing The Firestick Remote For Volume Control
It’s very easy to connect a new remote to your Fire Stick, and it can also help you if your old remote doesn’t work. The steps are here.
1 – Hold down the “Home button” on your Firestick’s remote to go into the “Settings,” or navigate to it from the “Home Screen.”
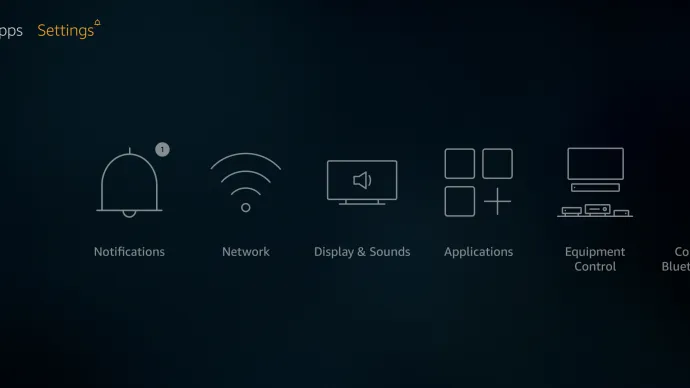
2 – Go to the right and select “Equipment Control.”
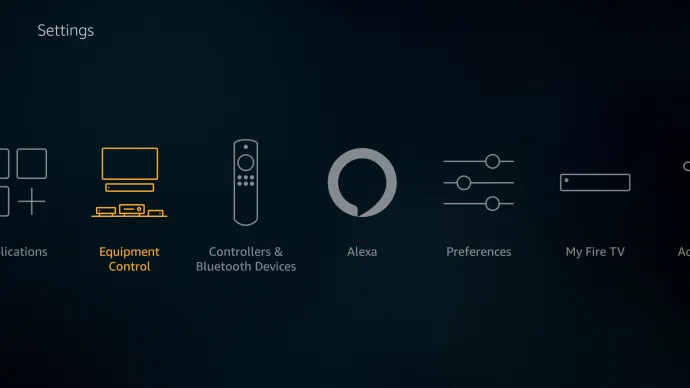
3 – Choose “TV,” then a loading screen appears.
4 – A new screen comes up. Here, You get asked, “What brand of TV do you have?”
5 – Choose the appropriate brand.
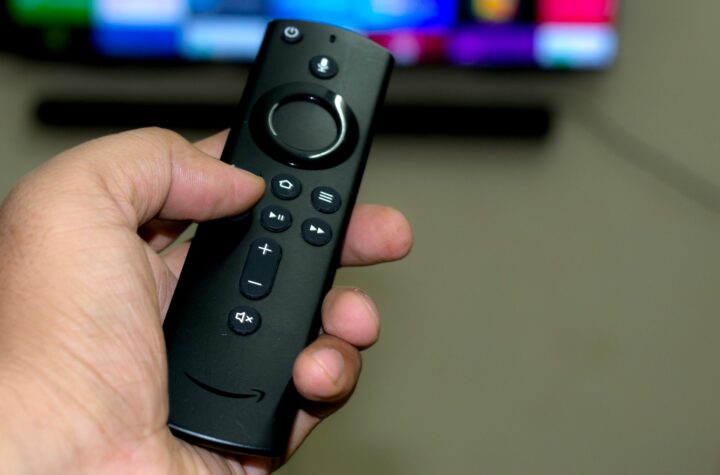
6 – Now, Press the “Power button” on your remote. This turns the TV off.
7 – Wait for 10 seconds, then press the “Power button” again. The TV turns back on.
8 – Here, You get asked, “Did your TV turn off and then back on when you pressed the Power button?” Choose “Yes” if it worked. Sometimes, you may have to try and pair the remote a few times before it works.
9 – Next, try turning up the volume. Also, The device plays some music so you can check.
10 – Now, If the volume changes, click “Yes.” If not, choose “No” and try the setup process again.
11 – Lastly, Follow the prompts to end the setup. Here, You get asked about your TV’s input settings after setting the remote.
Many people had said that they had to run through the remote setup process at least three times before it worked. So be patient and work it again a few times. If you don’t want to know how it works, know that the remote is scanning and setting itself to match the TV IR receiver’s frequency. Users of Fire Stick devices with the second-generation Alexa remotes can also control the volume via voice commands. First, make sure the Microphone button on your remote is pressed. Then, tell Alexa to increase or decrease the volume.
Using Alexa To Control TV Volume
Well, Don’t forget; if you don’t have a Fire TV Stick 4K remote that supports volume control, you can still use Echo devices to ask Alexa to turn your volume up or down. You also have the Alexa remote, which you can use whenever you need. Most TVs won’t be able to use this. If your TV or other device supports CEC, you should be able to control your TV’s volume with no other remote at all.
Troubleshooting
Most Amazon products work well, but there are some problems with the Firestick and other products. Is anything going on? And what should you do? Then, let’s look at some troubleshooting steps that can help you get your volume back on.
First, if your volume controls don’t work, change the batteries in your Firestick remote to get them to work again. First, you’ll want to check sure this isn’t a mistake. This is the next thing to do. After that, check that nothing is blocking your FireTV or Firestick from working. There’s likely a problem with the remote if it doesn’t work, so check the signal. To get the signal to work again, get rid of anything that might be blocking it.
Restart your Firestick if the batteries are good and there isn’t anything blocking the signal. You can also change the HDMI port. Make sure you’re using an HDMI-CEC port. You can also factory reset your Firestick, but you can do it if that doesn’t work.
FAQ:
Well, here are some more answers to your questions about the Firestick.
What Is HDMI-CEC?
If you don’t know what the ports on your TV are for, most newer TVs have HDMI-CEC (Consumer Electronics Control). The HDMI-CEC port lets you use one remote to control all of your devices. Some TVs call this port ” HDMI-CEC,” but not all say that. For example, there are two ports on Philips TVs: one called “EasyLink” and one called “BRAVIA Link.” People who own a TV should check the manual to see which port they should use with their Firestick to connect it to their TV.
In the end, you can use the Fire TV Stick remote to control the volume on your TV as long as you have the right remote (4K Firestick or newer). But don’t worry if you have a firestick that is a few years old. Echo Dot: You can talk to your Dot, use the microphone button to ask Alexa, or you can get a new remote from your Firestick.