
Even if you’ve got a brand-new computer, you may find a circumstance in which your computer runs extremely slow. You launch Task Manager to investigate and discover that your PC’s disk usage is 100 percent. If your drive is under such heavy pressure, it lacks spare cycles to complete basic operating system operations. If you’re having this problem, you’ll wish to fix 100 percent disk usage on the Windows 11. Well, here are some suggestions to assist you in addressing the problem.
How To Quickly Fix 100 Percent Disk Usage On Windows 11?
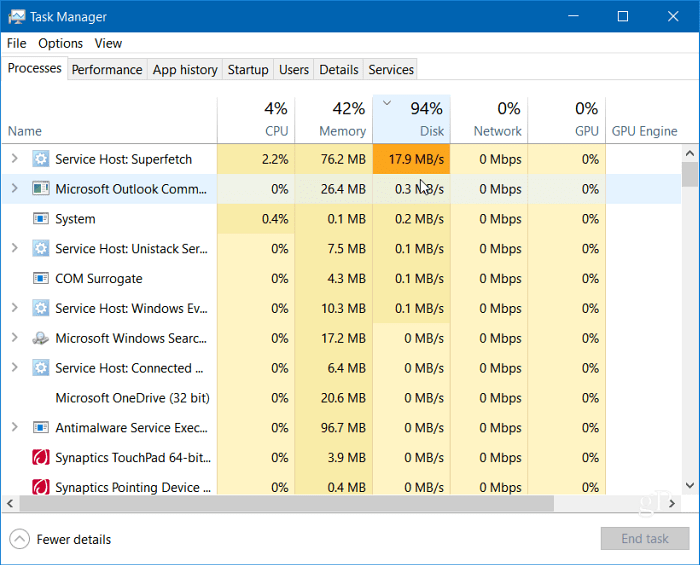
Using Task Manager is a simple technique to find the culprit app or service causing 100 percent disk usage. Well, to open Task Manager, right-click the Start menu and choose Task Manager. Next, click the Disk column heading to discover what’s using the most resources. You’ll have a fine idea of where to begin from there. However, the problem may be more serious than just dismissing an app or stopping a service. So, please continue reading to find out about further probable sources of the problem and how to fix them.
Disable Superfetch
By accessing a prefetch file, the Superfetch function, also known as SysMain in Windows 11, helps to reduce boot time and load apps more effectively. However, while it is a useful feature that enhances speed, it might result in high disk usage. To deactivate Superfetch (SysMain) on Windows 11, do the following steps:
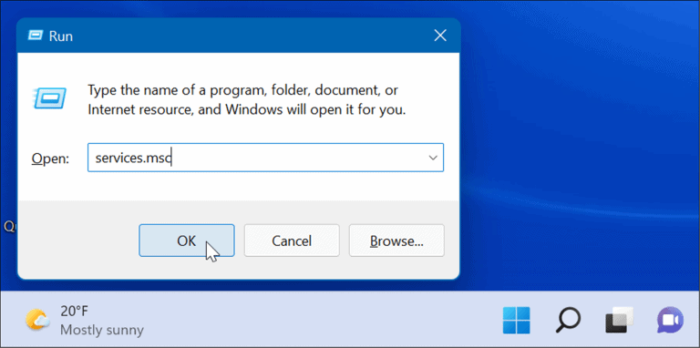
1 – To launch the Run dialogue, shortcut Windows key + R.
2 – In the Run box, type services.msc and press OK.
3 – When the Services console appears, double-click SysMain and then click the Stop button.
4 – Next, select Disabled from the selection menu next to the Startup type.
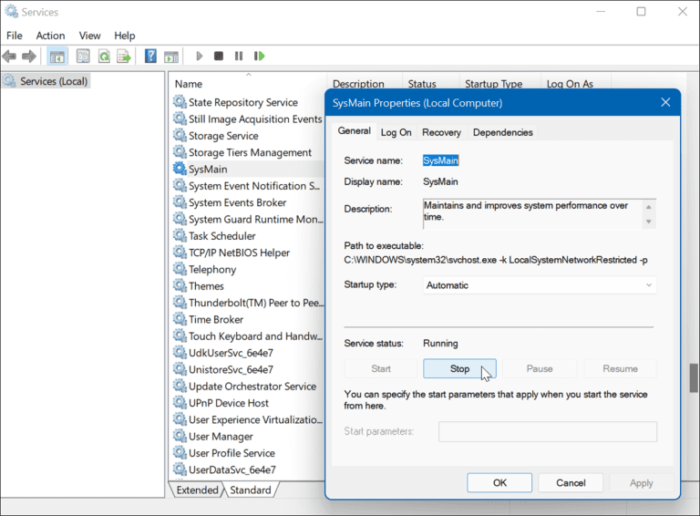
5 – Click Apply and OK to exit the Services console.
After pausing SysMain, you should observe a change in Disk Usage in Task Manager; however, you need to restart your PC to make it’s fixed.
Rebuild Search Index
Another typical problem of high disk usage in Windows 11 is search indexing. To provide search results quicker, search indexing examines files, emails, photos, and other system files on your PC. If anything goes wrong, it might result in an infinite search cycle. However, you may repair it by rebuilding the database. To rebuild the search index, accomplish the following steps:
1 – Press the Windows key or click Start, type indexing options, and select the top result.
2 – When the Indexing Options box appears, click the Advanced option.
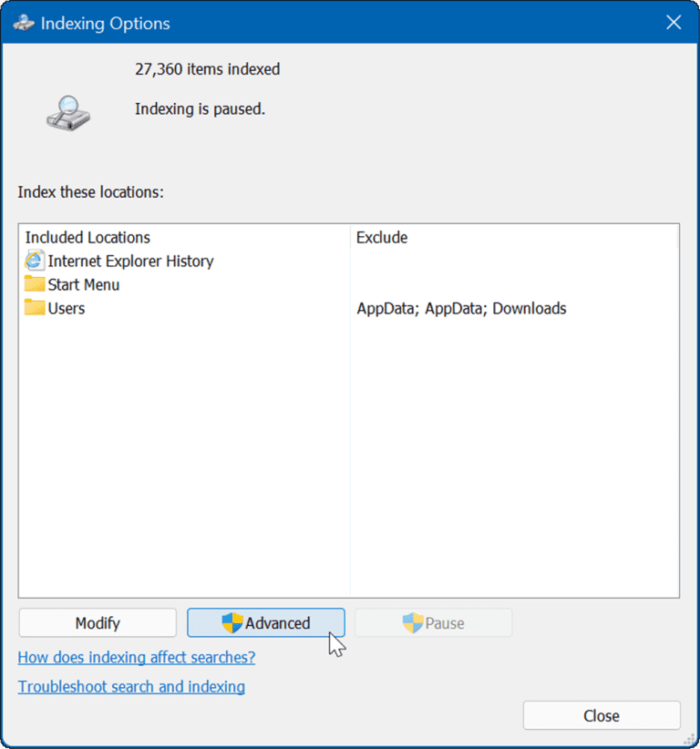
3 – In the Troubleshooting section, click the Rebuild option and then OK to confirm.
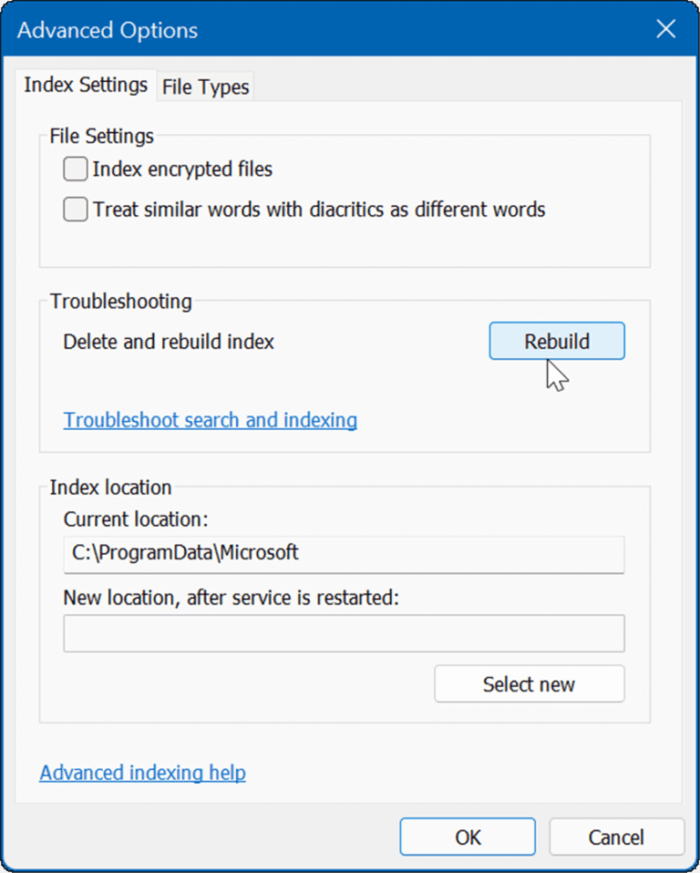
This procedure may take some time, so you should take a break from your computer. The time required may vary depending on the drive’s amount of data and speed, i.e., SSD vs. HDD.
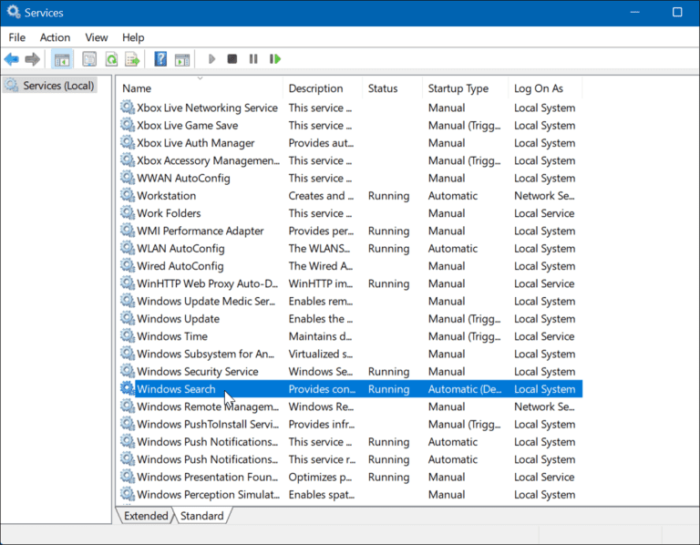
Disable Search Indexing Completely
If the rebuild works but you find yourself performing a lot of rebuilds, you may turn off search indexing completely. Use the following procedures to deactivate Windows Search:
1 – To launch the Run dialogue, shortcut Windows key + R.
2 – In the Run box, type services.msc and press OK.
3 – Double-click on Windows Search when the Services console appears.
4 – When the Windows Search Properties box displays, select Disabled as the Startup type.
5 – Select Stop, then OK.
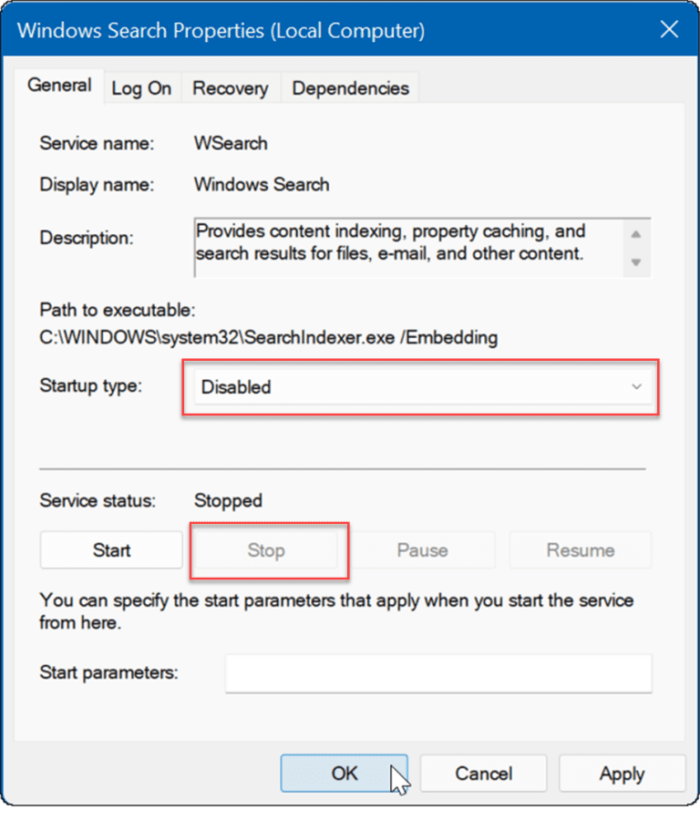
Search indexing is now disabled and will not run if you reboot your PC.
Delete Temporary Files
Leftover temporary files may produce excessive disk burden, and removing the files can fix 100 percent of disk usage on Windows 11. To remove temp files from Windows 11, follow these steps:
1 – To launch the Run dialogue, shortcut Windows key + R.
2 – In Run, enter %temp% and press OK.
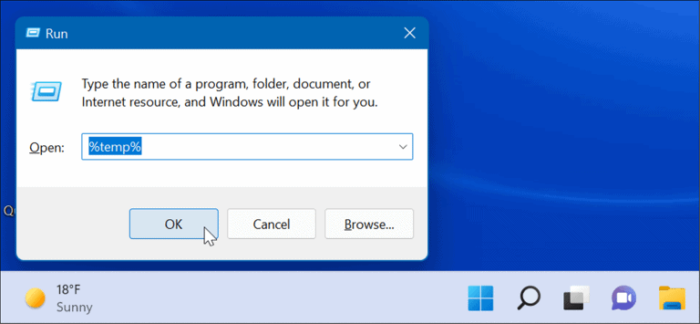
3 – In File Explorer, open the Temp folder; press Ctrl + A to select everything in the folder, then click the Delete button in the toolbar.

Disable DiagTrack Service
Well, the Connected User Experiences (DiagTrack) service, often known as Telemetry data, operates in the background and sends Microsoft data on your PC usage. Therefore, it might be the source of a high disk usage percentage. Use the following steps to deactivate the DiagTrack service:
1 – To launch Task Manager and select the Services tab, press Ctrl + Shift + Esc.
2 – Right-click DiagTrack and select Stop from the menu.
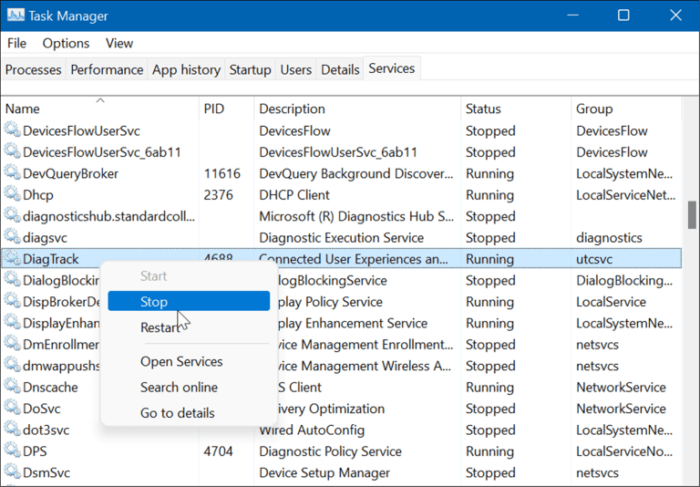
3 – Next, click the Open Services option at the bottom of Task Manager.
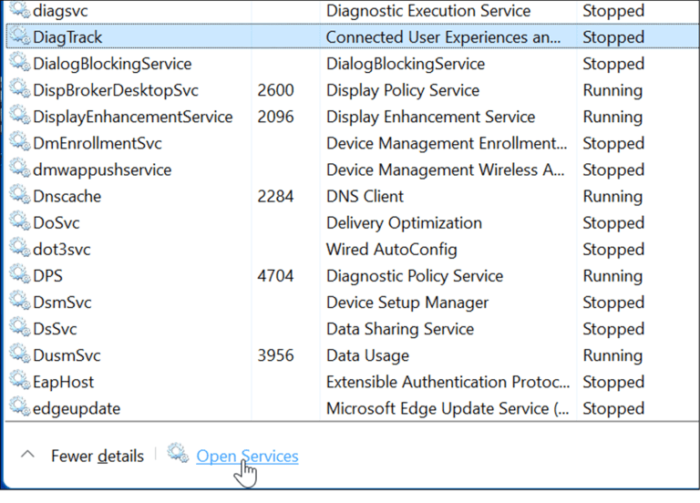
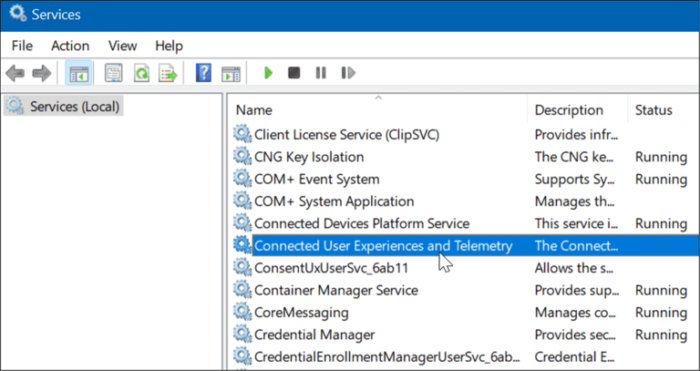
4 – Double-click the Connected User Experiences and Telemetry service when the Services window appears.
5 – On the General tab, change the Startup type to Disabled and click Apply.
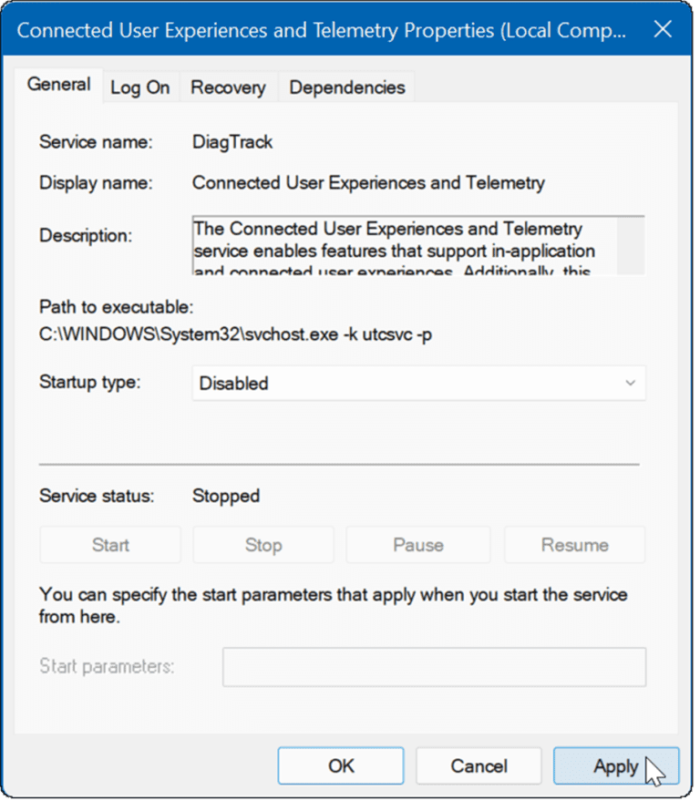
6 – Select the Recovery tab, set all 3 failure options to Take No Action, and click OK.

The service is now deactivated, and you don’t have to worry about it running when you reboot your PC.
Check Malware
Another crucial and most important thing to check for is viruses and/or other malware. The Windows Security (Formerly Windows Defender) is built-in and continuously analyses your system for malware. However, it may only capture some things. You may manually run a virus scan by following these steps:
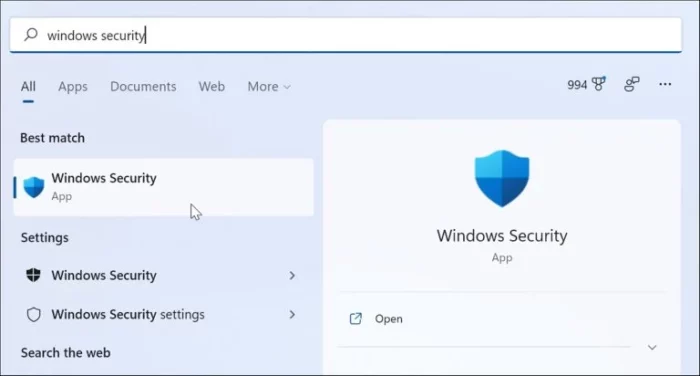
1 – Press the Windows key or click Start, type windows security, and choose the top result.
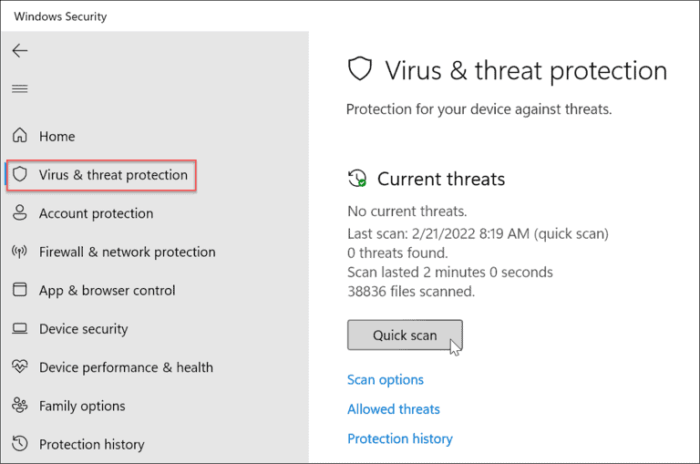
2 – On the left, choose Virus & threat protection and click the Quick scan button.
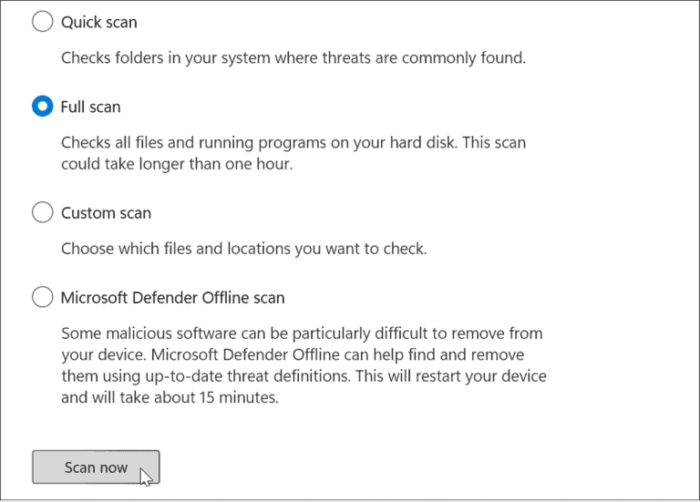
3 – If nothing is found and you still have 100 percent disk usage, run a deeper scan. To do so, select the Scan options link and choose Full scan or Microsoft Defender Offline scan.
A more thorough scan takes longer, but it is worth the wait if your system is plagued with persistent malware. An offline scan will make a restart, so close any open files before you begin. It is also critical to get a second viewpoint. If you’re dubious about a file, run a scan using a reputable and free security app such as Avast or AVG AntiVirus.
Run SFC And DISM Scan
Missing or damaged files in Windows might result in a high disk load as your PC attempts to compensate. Fortunately, Windows has a handful of tools that may help you scan for corrupt files and replace them with good ones. To use these tools, run the following steps:
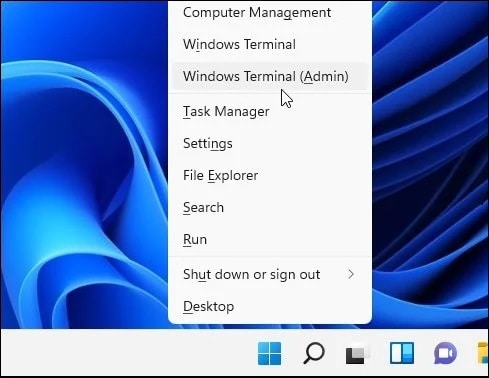
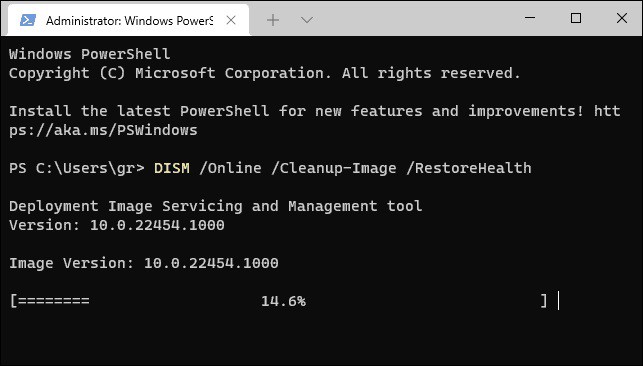
1 – From the Start menu, right-click and choose Windows Terminal (Admin).
2 – In the terminal, type the following command and press Enter:
DISM /Online /Cleanup-Image /RestoreHealth
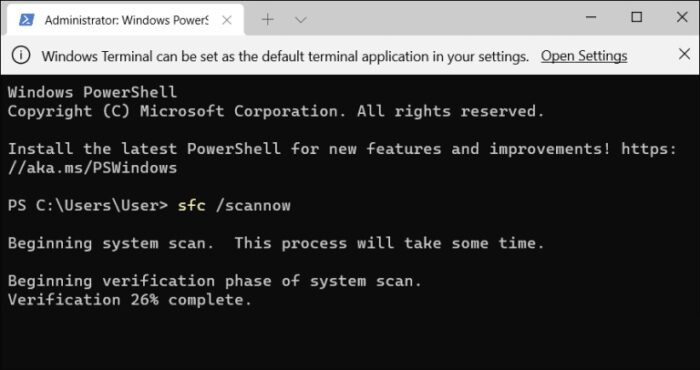
3 – Once the DISM command has finished, type the following command and press Enter:
sfc /scannow
Check Hard Disk For Errors
Another thing you may do to resolve 100 percent disk usage in Windows 11 is to inspect the disk for errors. You may check the disk for errors by following these steps:
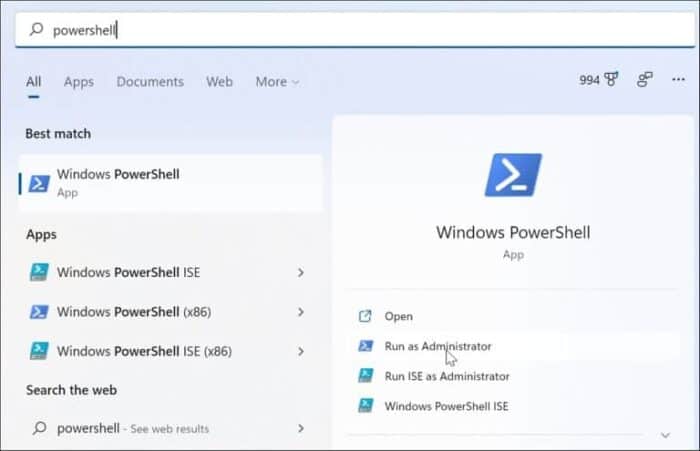
1 – In the Start menu, type powershell.
2 – Hover over the top result, then choose Run as Administrator.
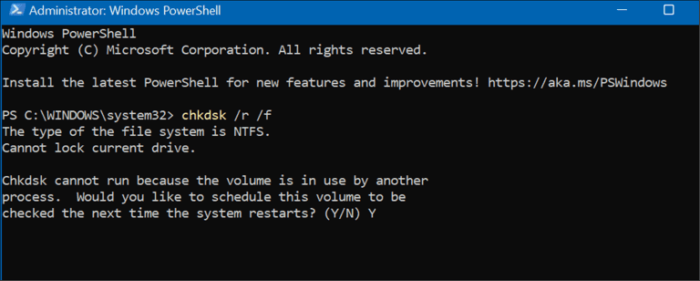
3 – When the terminal window appears, type the following command and press Enter.
Chkdsk /r /f
4 – When asked, type Y and press Enter to schedule the scan the next time you reboot your PC.
Conclusion:
If you’re witnessing 100 percent disk usage on the Windows 11, one of the solutions listed above might help.